Tutorial
Before you can use SLEAP, you’ll need to install it. Follow the instructions at Installation to install SLEAP and start the GUI app.
There are three main stages of using SLEAP:
Creating a project, opening a movie and defining the skeleton;
Labeling and learning, labeling of video frames assisted by network predictions;
Prediction and proofreading, final network predictions of body-part positions and proofreading of track identities in full videos.
This tutorial covers stage 1 and the first half of stage 2. For the rest of the process, see Tutorial, Part 2.
Stage 1: Creating a project
When you first start SLEAP you’ll see an open dialog. Since you don’t yet have a project to open, click “Cancel” and you’ll be left with a new, empty project.
Opening a video
Add a video by clicking the “Add Video” button in the “Videos” panel on the right side of the main window.
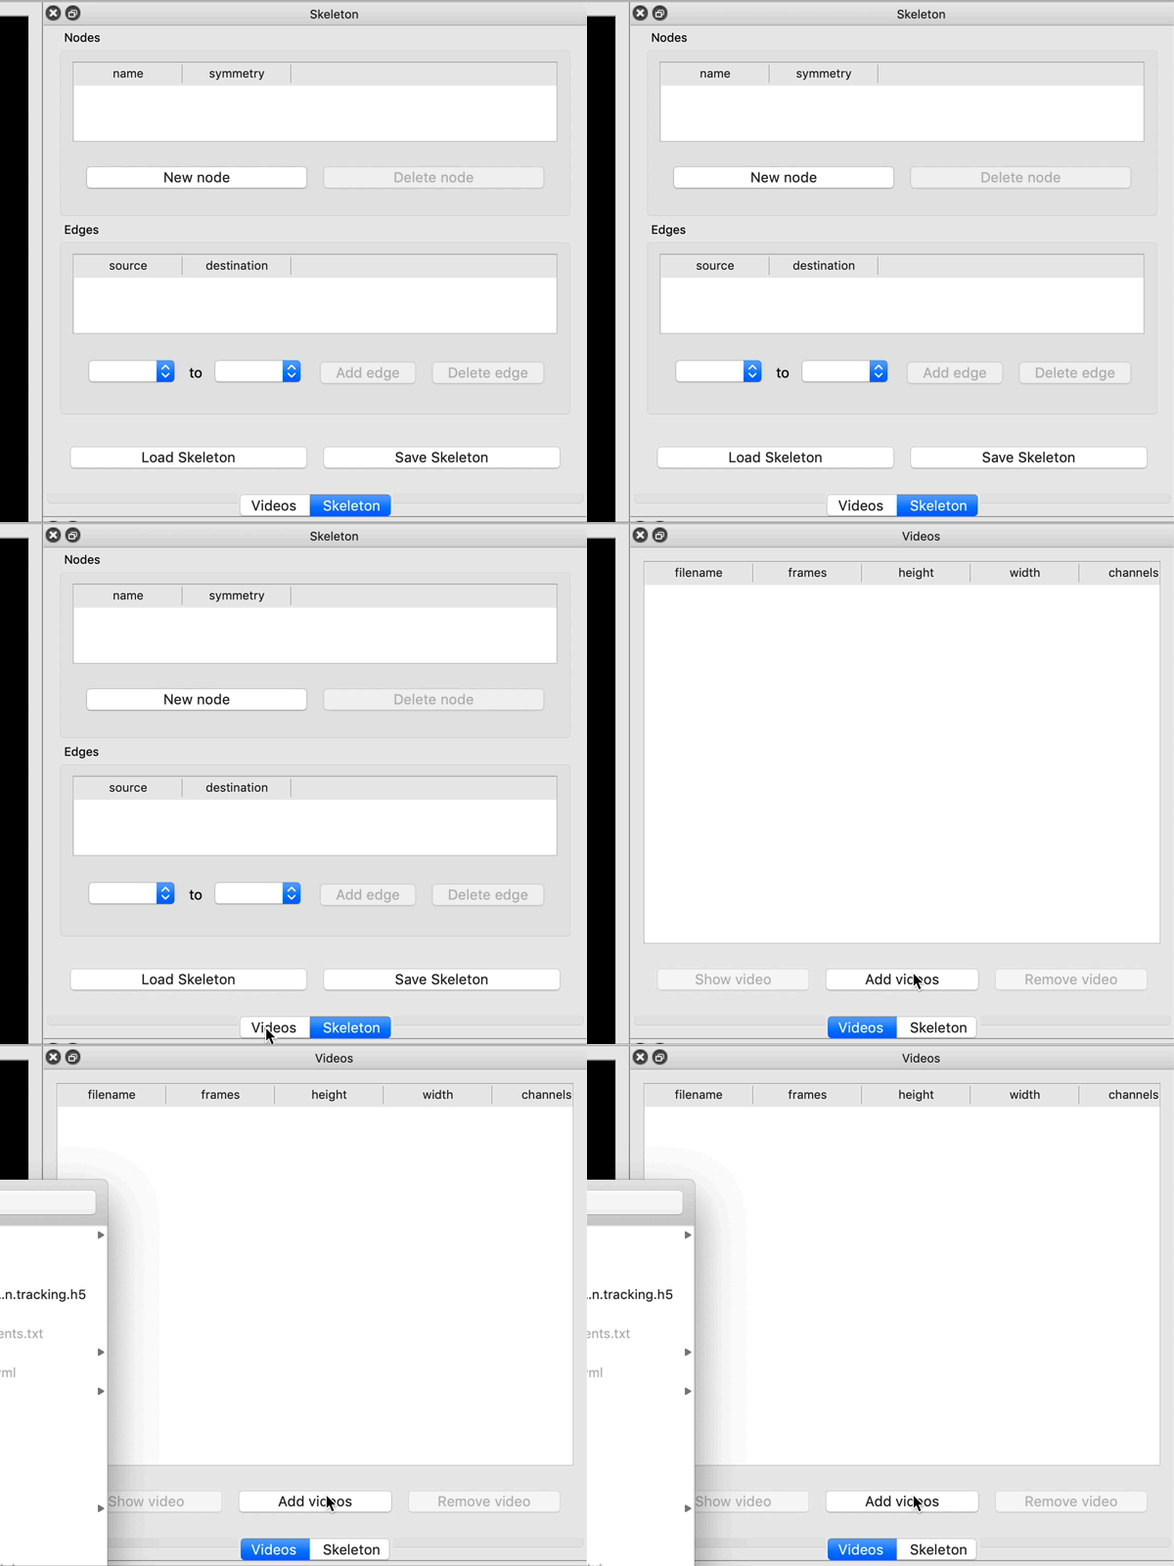
You’ll then be able to select one or more video files and click “Open”. SLEAP currently supports mp4, avi, and h5 files. For mp4 and avi files, you’ll be asked whether to import the video as grayscale. For h5 files, you’ll be asked the dataset and whether the video is stored with channels first or last.
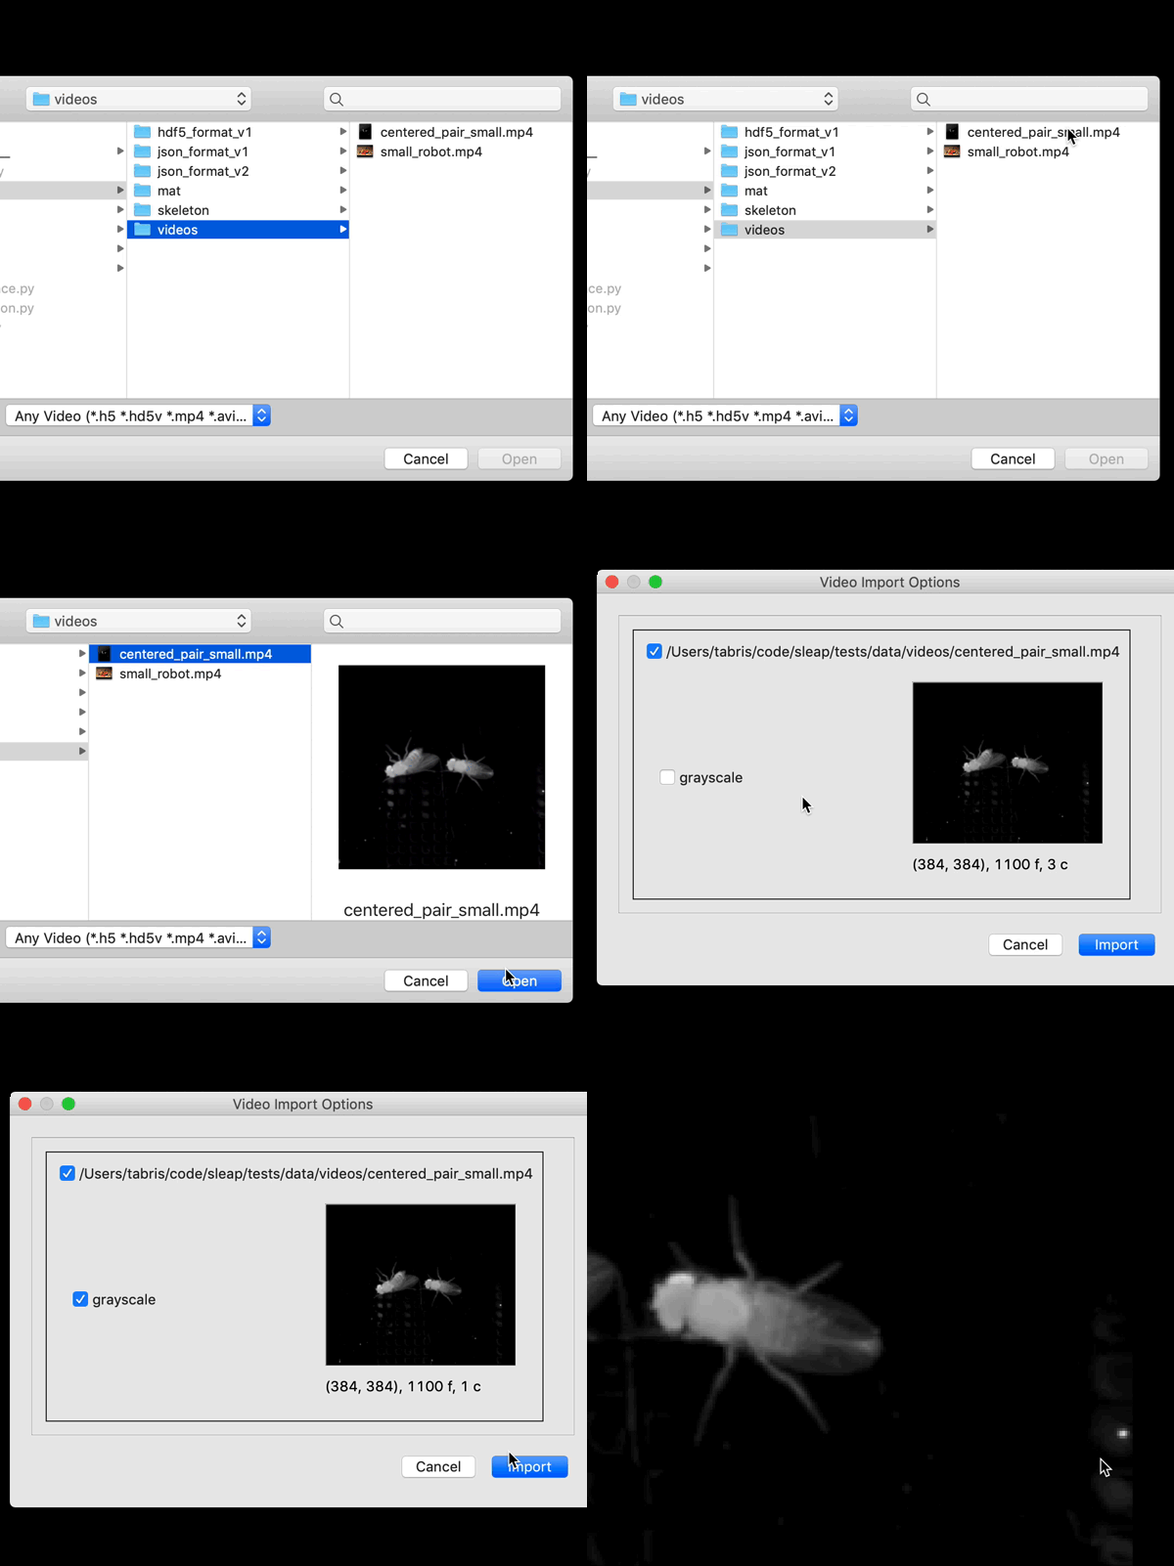
Creating the Skeleton
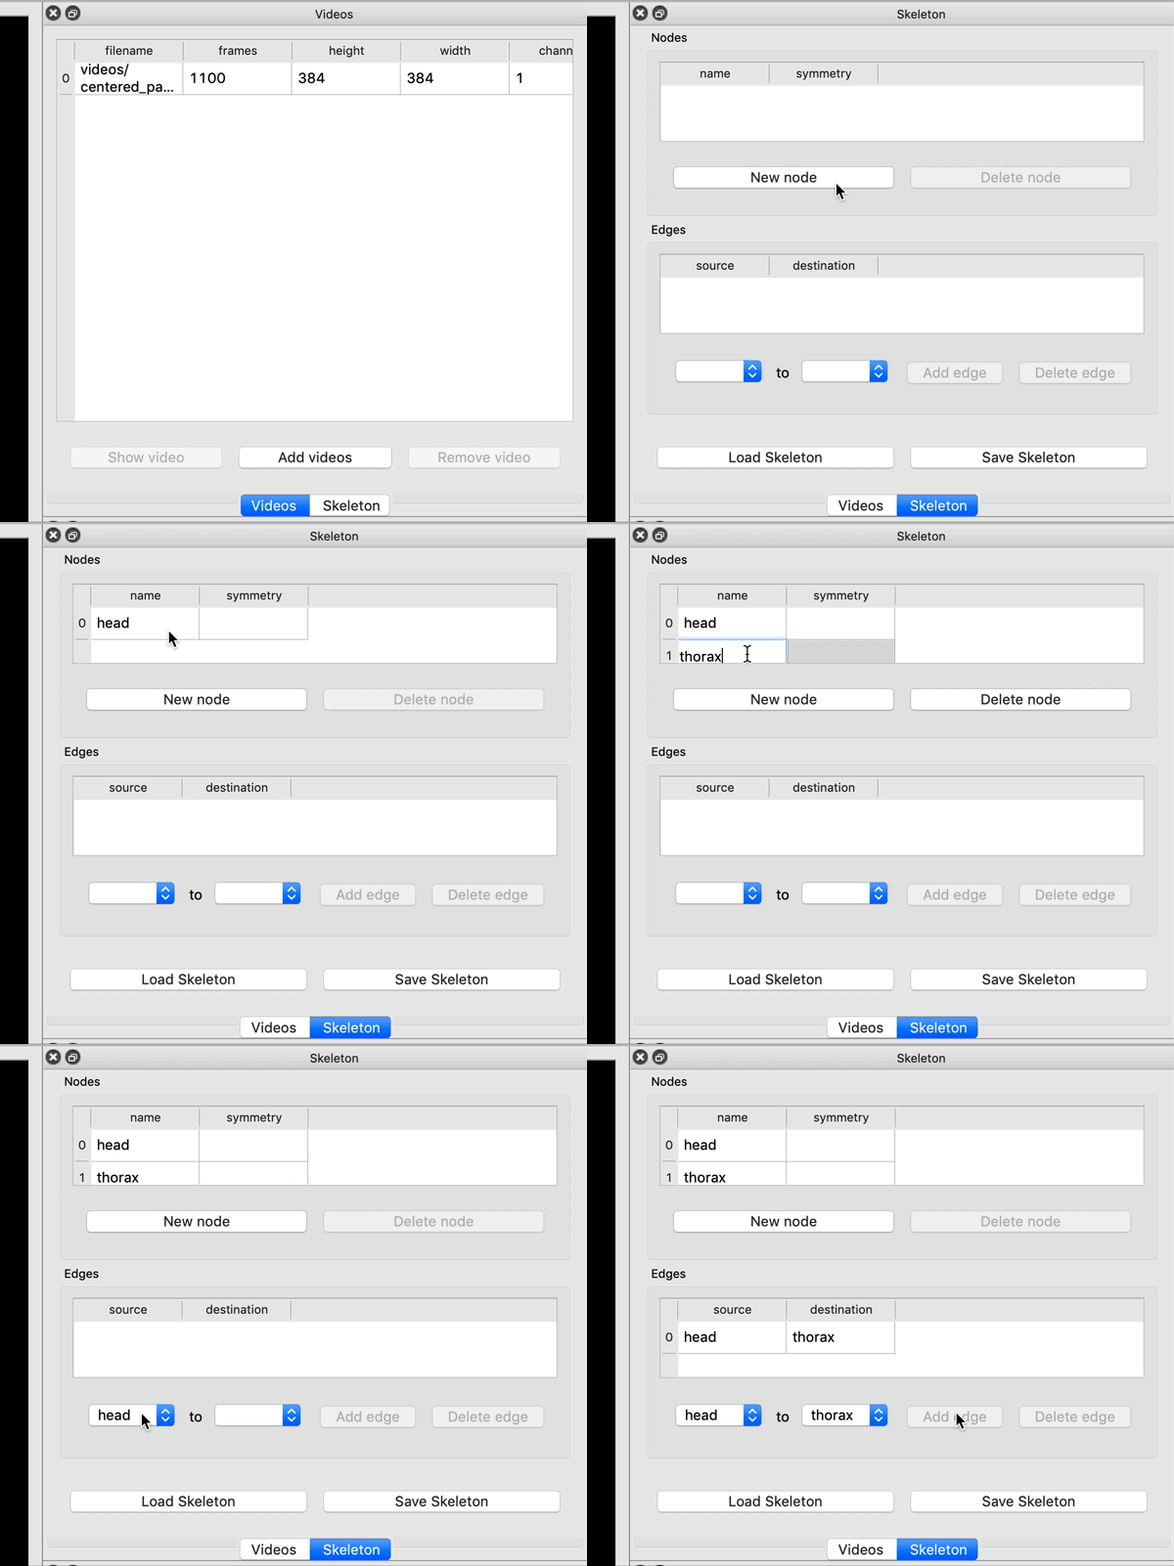
Create a new skeleton using the “Skeleton” panel on the right side of the main window.
Use the “New Node” button to add a node (i.e., joint or body part). Double-click the node name to rename it (hit enter after you type the new name). Repeat until you have created all your nodes. You then need to connect the nodes with edges. Directly to the left of the “Add edge” button you’ll see two drop-down menus. Use these to select a pair of nodes, and then click “Add Edge”. Repeat until you’ve entered all the edges.
Stage 2a: Initial Labeling
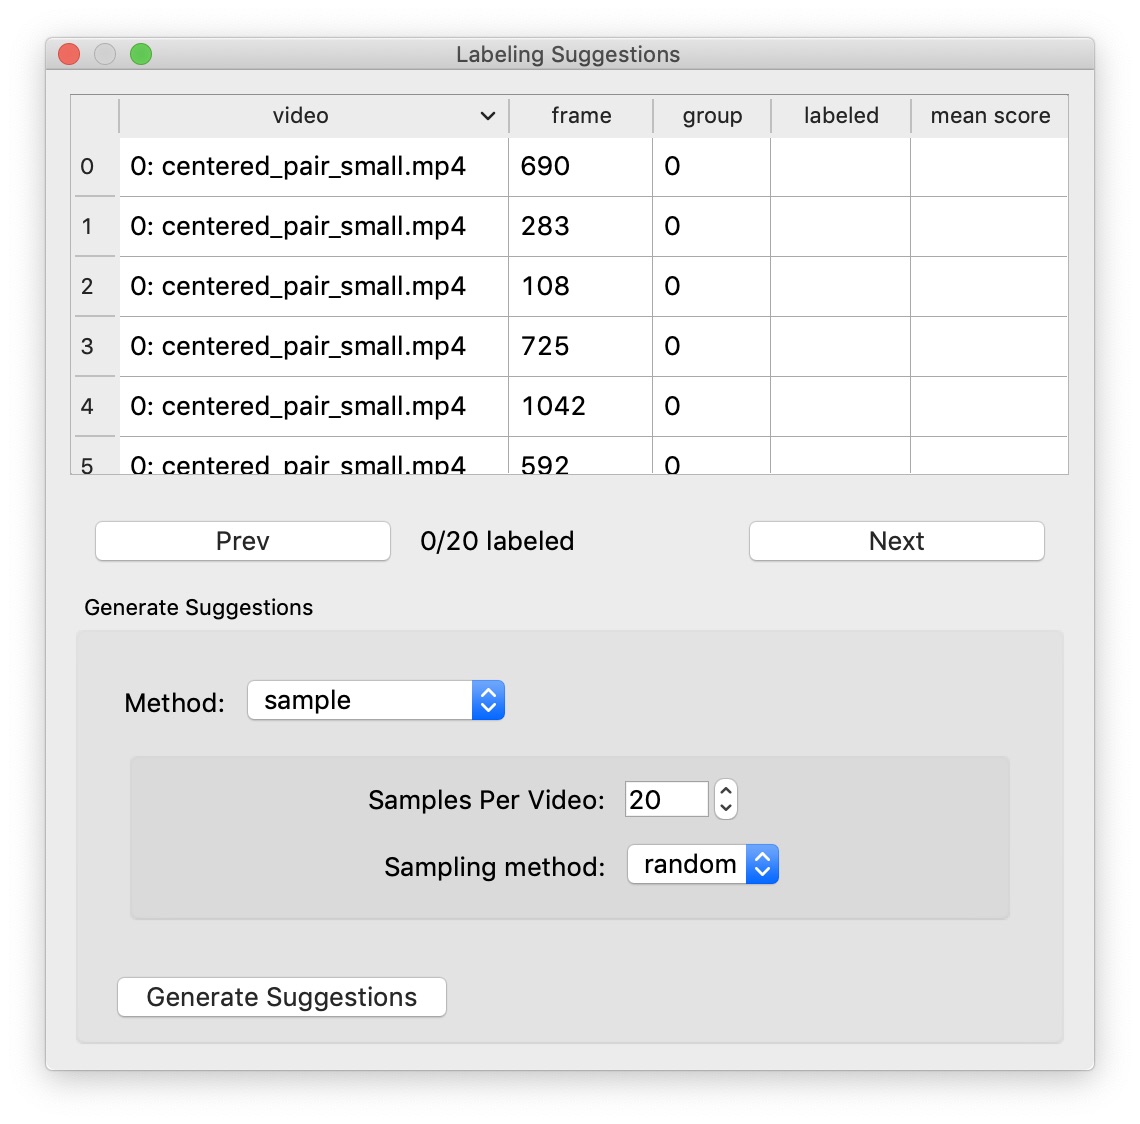
We start by assembling a candidate group of images to label. You can either pick your own frames or let the system suggest a set of frames using the “Labeling Suggestions” panel. SLEAP can give you random or evenly-spaced samples, or it can try to give you distinctive groups of frames by taking the image features into account.
For now, let’s just get 20 random frames. Choose “sample” as the method and “random” as the sampling method, then click “Generate Suggestions”.
Labeling the first frame
Start by adding an instance of the skeleton to the current image by clicking the “Add Instance” button in the Instances panel. The first instance will have its points located at random. Move the points to their appropriate positions by dragging with the mouse. Use the mouse scroll-wheel to zoom.
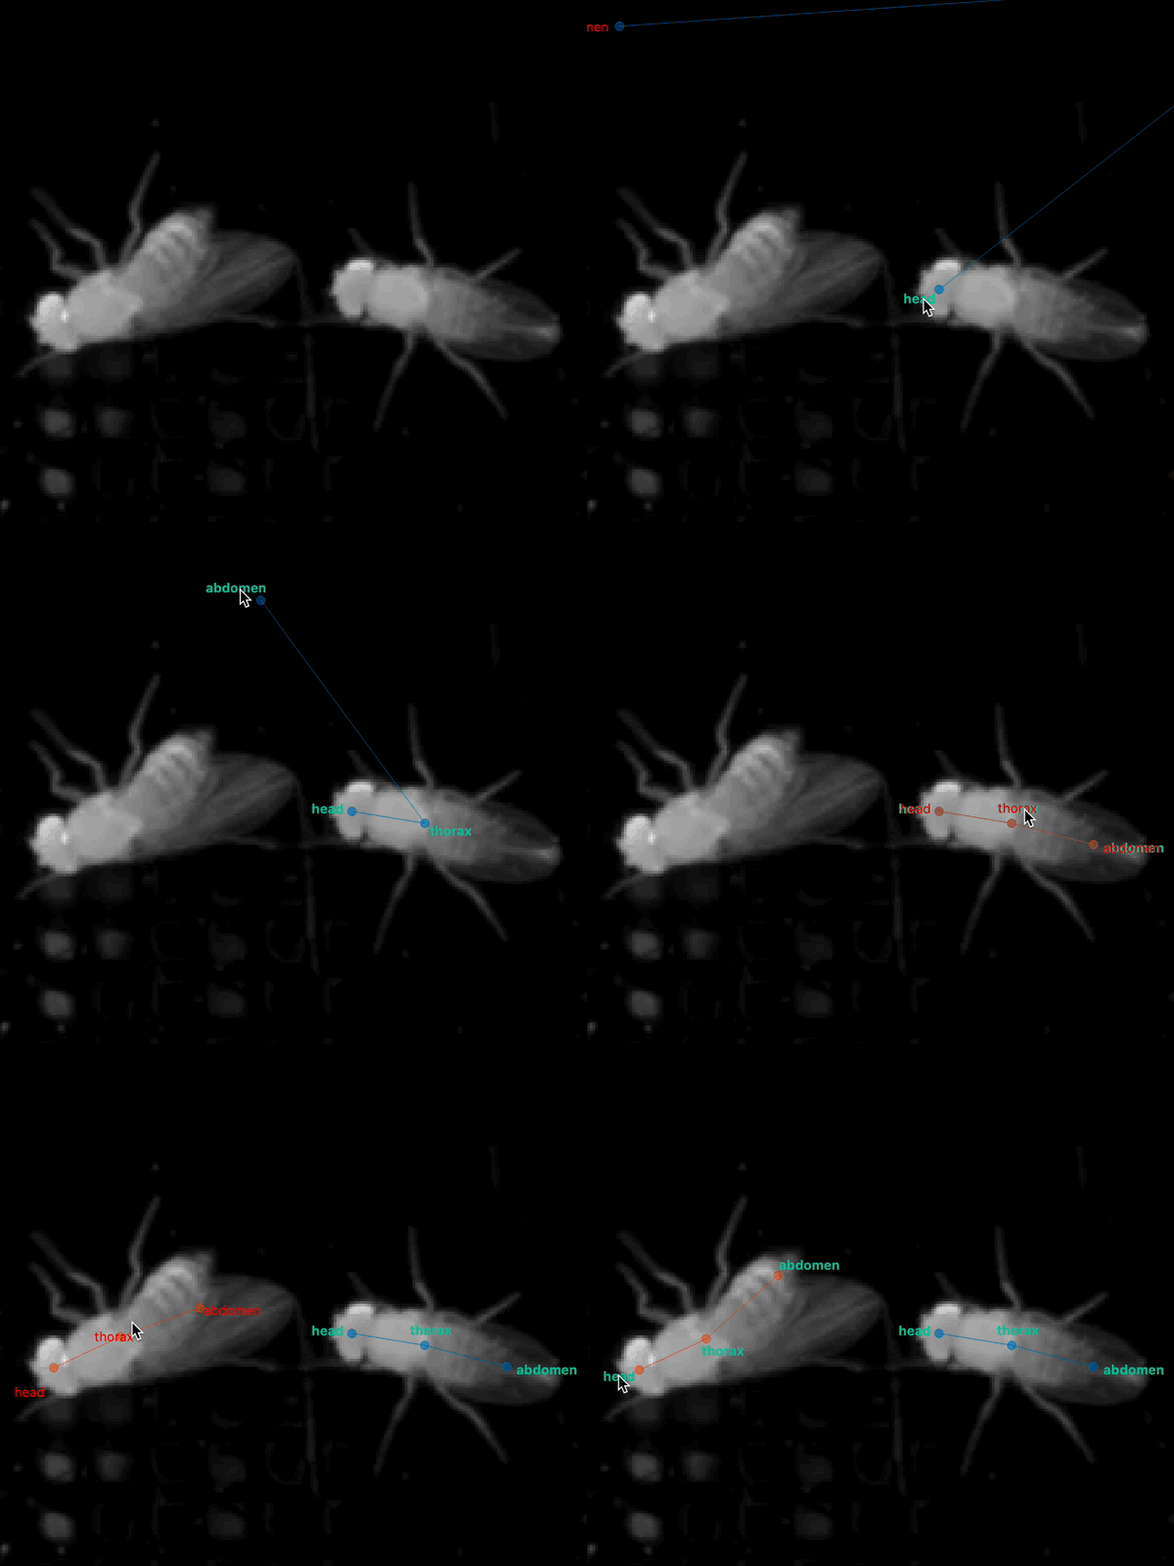
You can move the entire instance by holding down the Alt key while you click and drag the instance. You can rotate the instance by using the scroll-wheel while holding down the Alt key (or Option on a Mac).
For body parts that are not visible in the frame, right-click the node (or its name) to toggle visibility. The node will appear smaller to show that it’s marked as “not visible”. If you can determine where an occluded node would be in the image, you may label it as “visible” in order to train the model to predict the node even when it’s occluded.
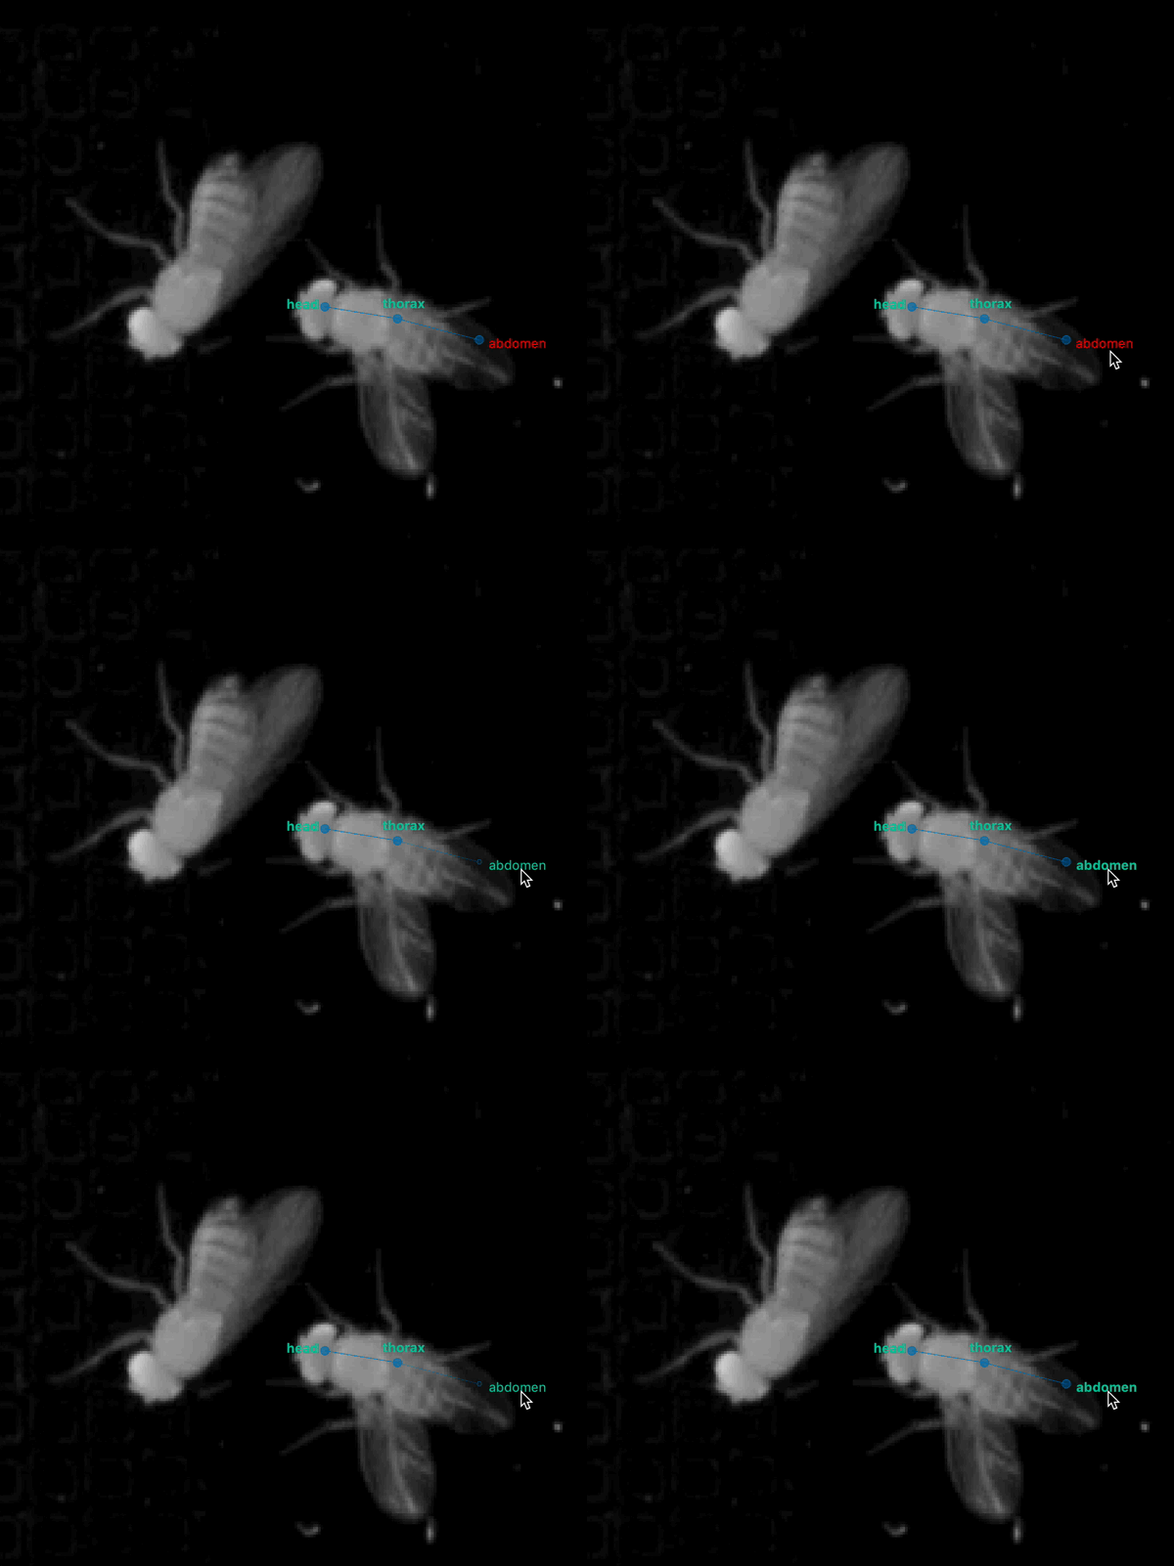
Saving
Since this is a new project, you’ll need to select a location and name the first time you save. SLEAP will ask you to save before closing any project that has been changed to avoid losing any work. Note: There is not yet an “undo” feature built into SLEAP. If you want to make temporary changes to a project, use the “Save As…” command first to save a copy of your project.
Labeling more frames
After labeling the first frame saving the project, it’s time to label more frames. Node positions will be copied from the instances in the prior labeled frame to increase labeling speed. Since you generated a list of suggested frames, you can go to the next frame in the labeling set by clicking “Next” under the list of suggested frames.
You can also always pick a frame to label by using the seekbar under the video.
Try adding an instance by right-clicking on the location of the animal in the video. You’ll see a pop-up menu with options for how we determine the initial node placement. Feel free to try the different options.
There’s no need to be consistent about which animal you label with which instance for the case of multiple animals. For instance, suppose you have a male and a female. It’s fine to label the male with the blue instance in some frames and the orange instance in others. Tracking (and track proofreading) is the final stage in the workflow and occurs after predicting body part locations.
When you label a frame, it’s best if you can label all the instances of your animal in the frame. Otherwise, the models may learn to not identify things that look like the instances you didn’t label.
Quick Training and Inference
Let’s see how quickly we can train models and start getting some predictions.
Start by labeling about 10 frames—this should be enough to at least get some initial results. Once you have the frames labeled, save your project.
Now you’re ready to train some models! To run training, select “Run Training…” from the “Predict” menu. For this tutorial, let’s use the default settings for training and predict on 20 random frames.
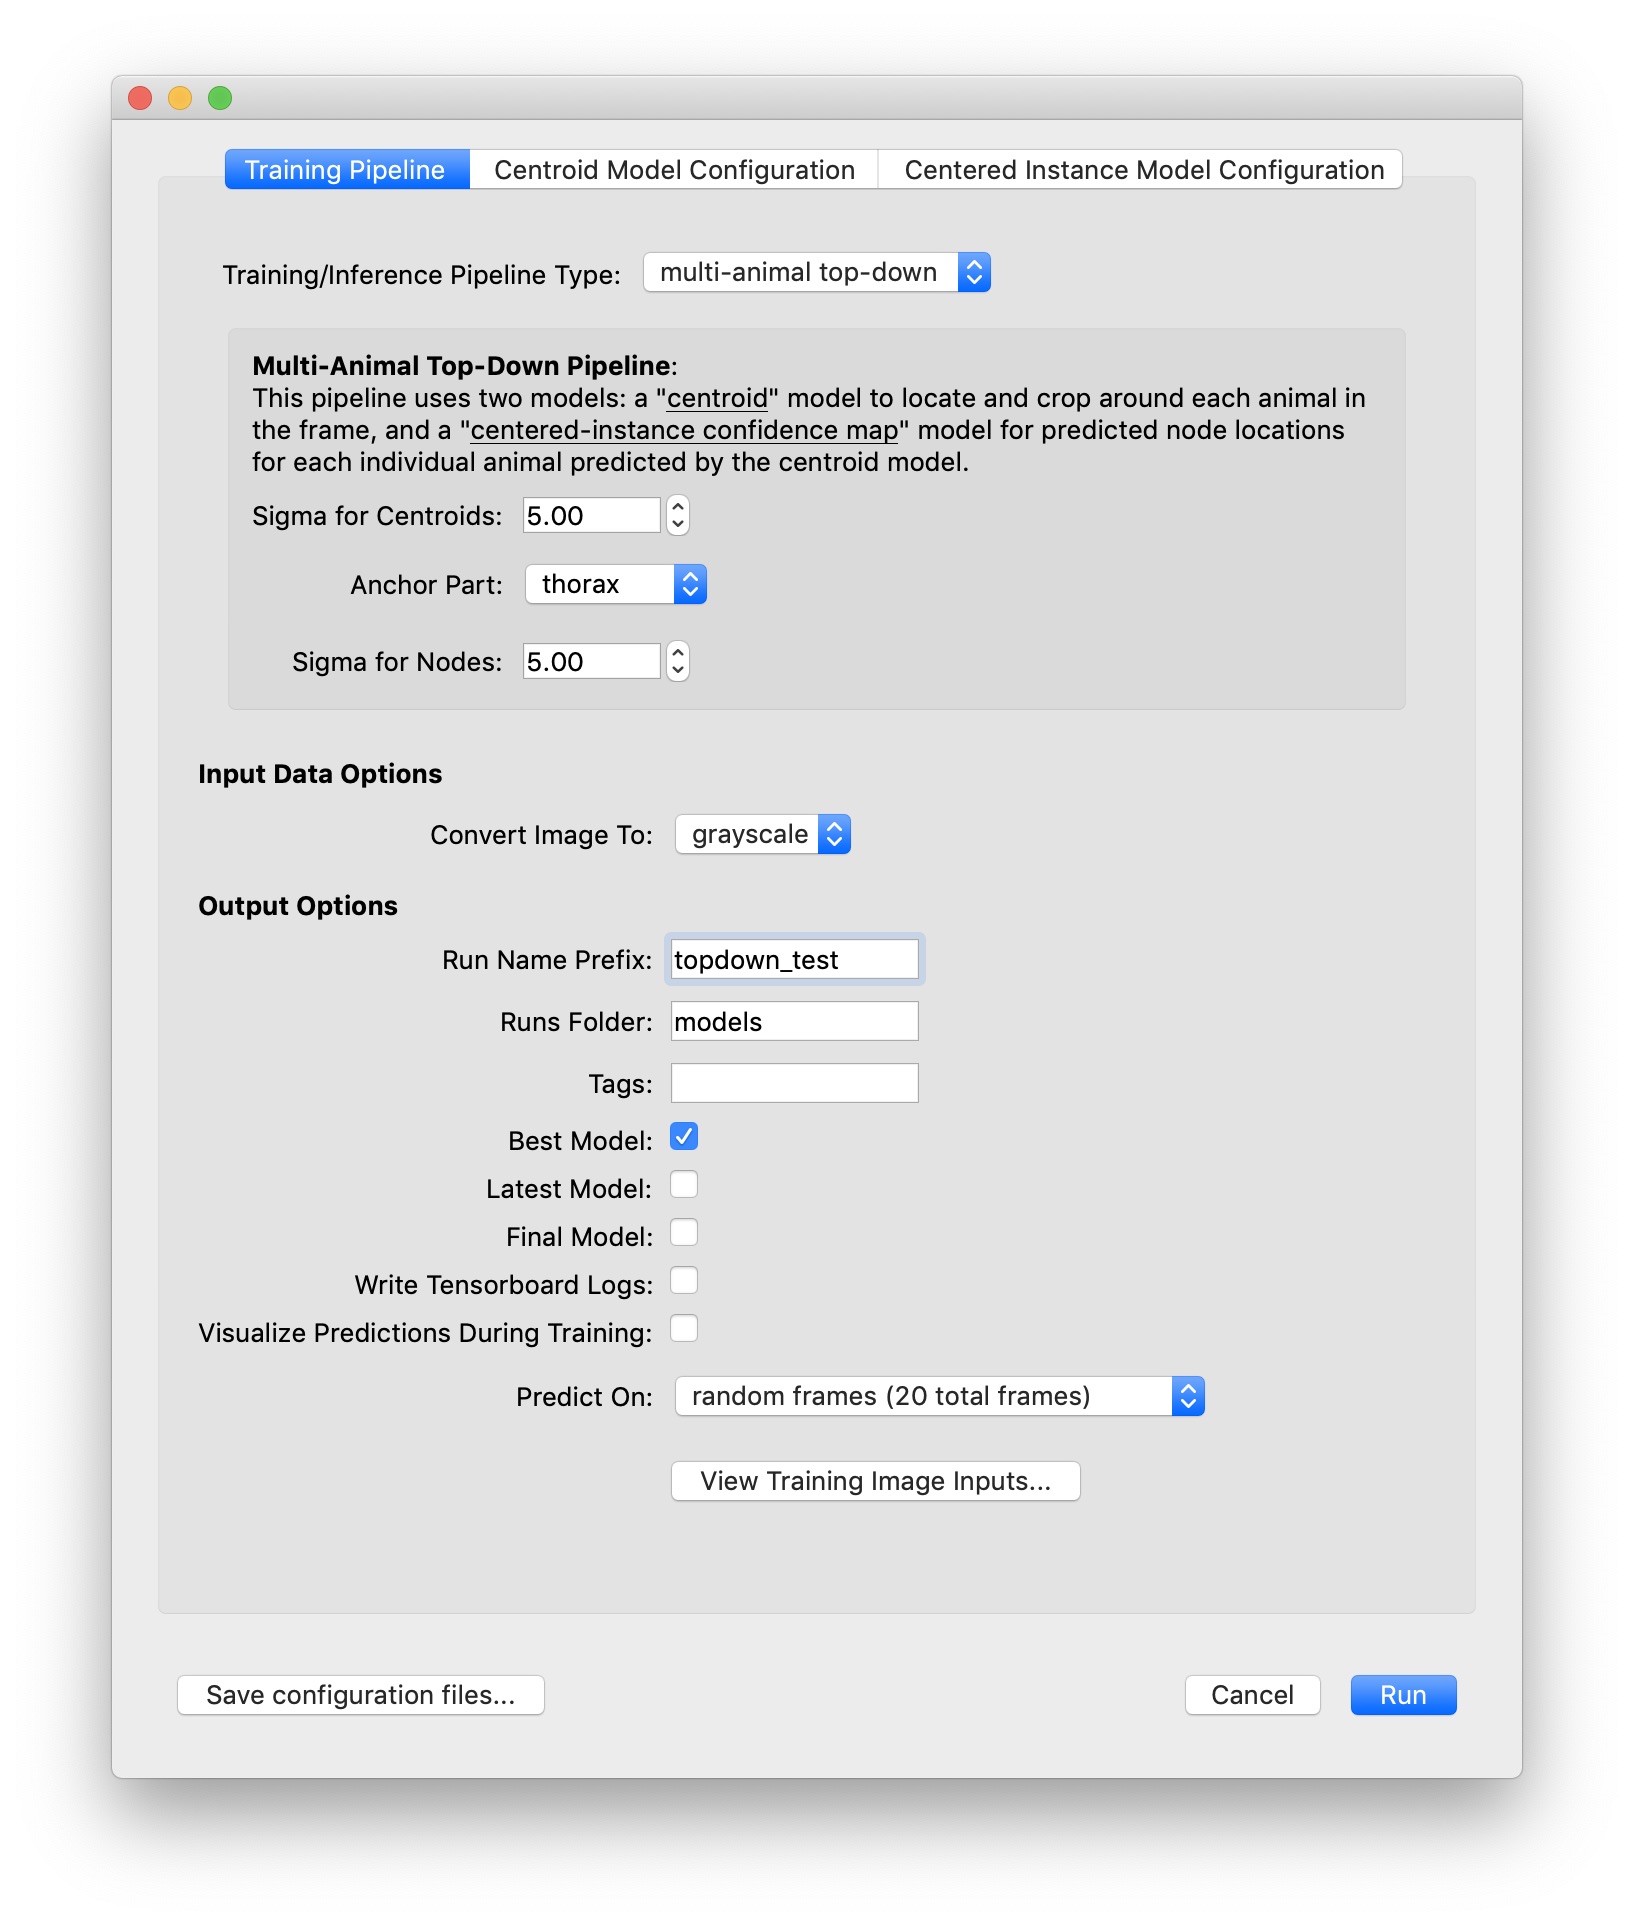
The default settings will train three models: one for confidence maps, one for part affinity fields, and one for centroids. The models will be trained in that order. You should see a window which shows you a graph of training and validation loss for each model as it trains.
Just for this tutorial, let’s stop each training session after about 10 epochs. This should take a minute or two for each model (assuming you have a usable GPU!), and should be good enough to get some initial predictions.
After each model is trained, inference will run and if everything is successful, you should get a dialog telling you how many frames got predictions. Frames with labels will be marked in the seekbar, so try clicking on the newly marked frames or use the “Next Labeled Frame” command in the “Go” menu to step through frames with labels.
For the next steps, continue on to Tutorial, Part 2.