Initial Labeling#
Selecting frames to label#
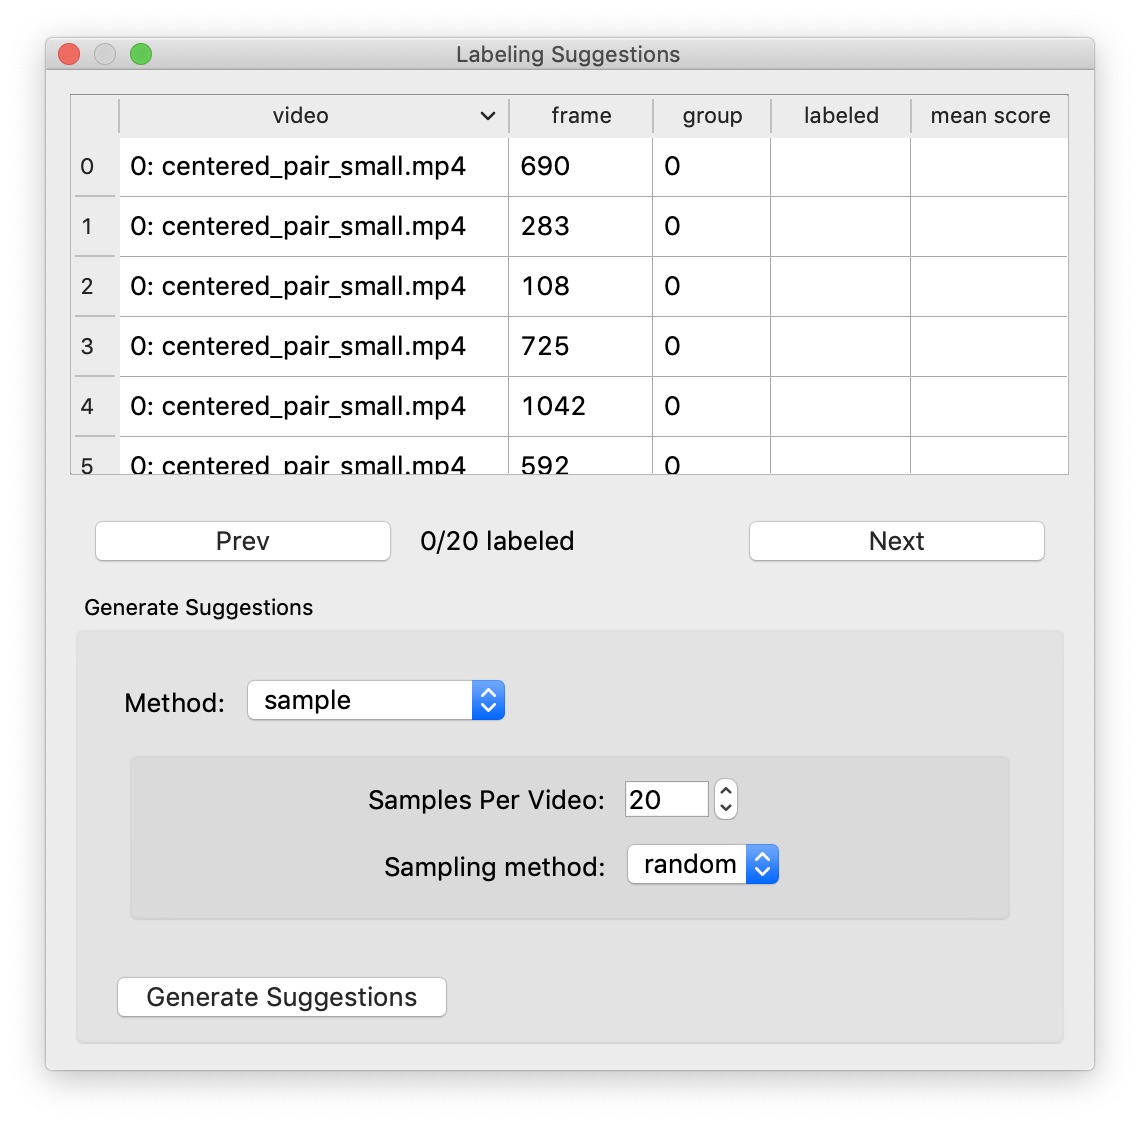
We start by assembling a candidate group of images to label. You can either pick your own frames or let the system suggest a set of frames using the “Labeling Suggestions” panel. SLEAP can give you random or evenly-spaced samples, or it can try to give you distinctive groups of frames by taking the image features into account.
For now, let’s just get 20 random frames. Choose “sample” as the method and “random” as the sampling method, then click “Generate Suggestions”.

(See Labeling Suggestions for more information about the suggestion methods.)
You can then move between suggested frames by double-clicking the frame information in the table or by clicking the “Prev” or “Next” buttons.
Labeling the first frame#
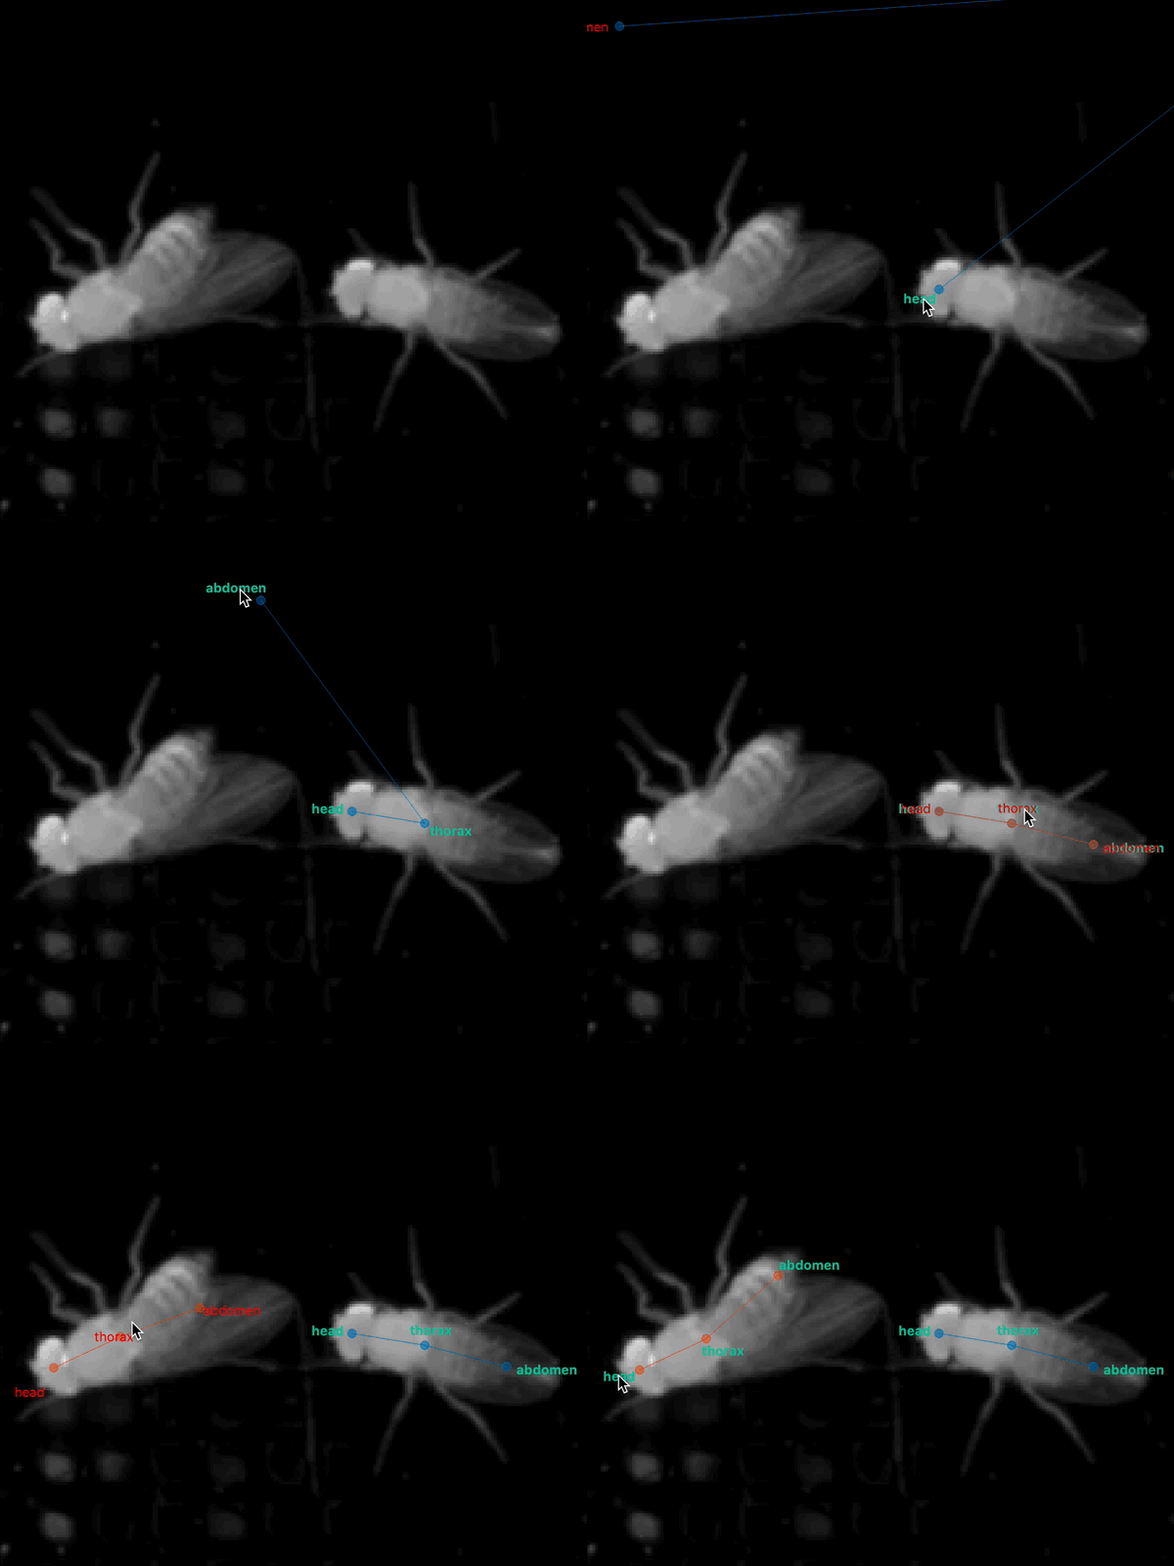
Start by adding an instance of the skeleton to the current image by clicking the “New Instance” button in the Instances panel. The first instance will have its points located at random. Move the points to their appropriate positions by dragging with the mouse. Use the mouse scroll-wheel to zoom.

You can move the entire instance by holding down the Alt key (or Option on a Mac) which you then click on a node and drag the instance. You can rotate the instance by holding down the Alt key while you then click on a node and use the scroll-wheel.
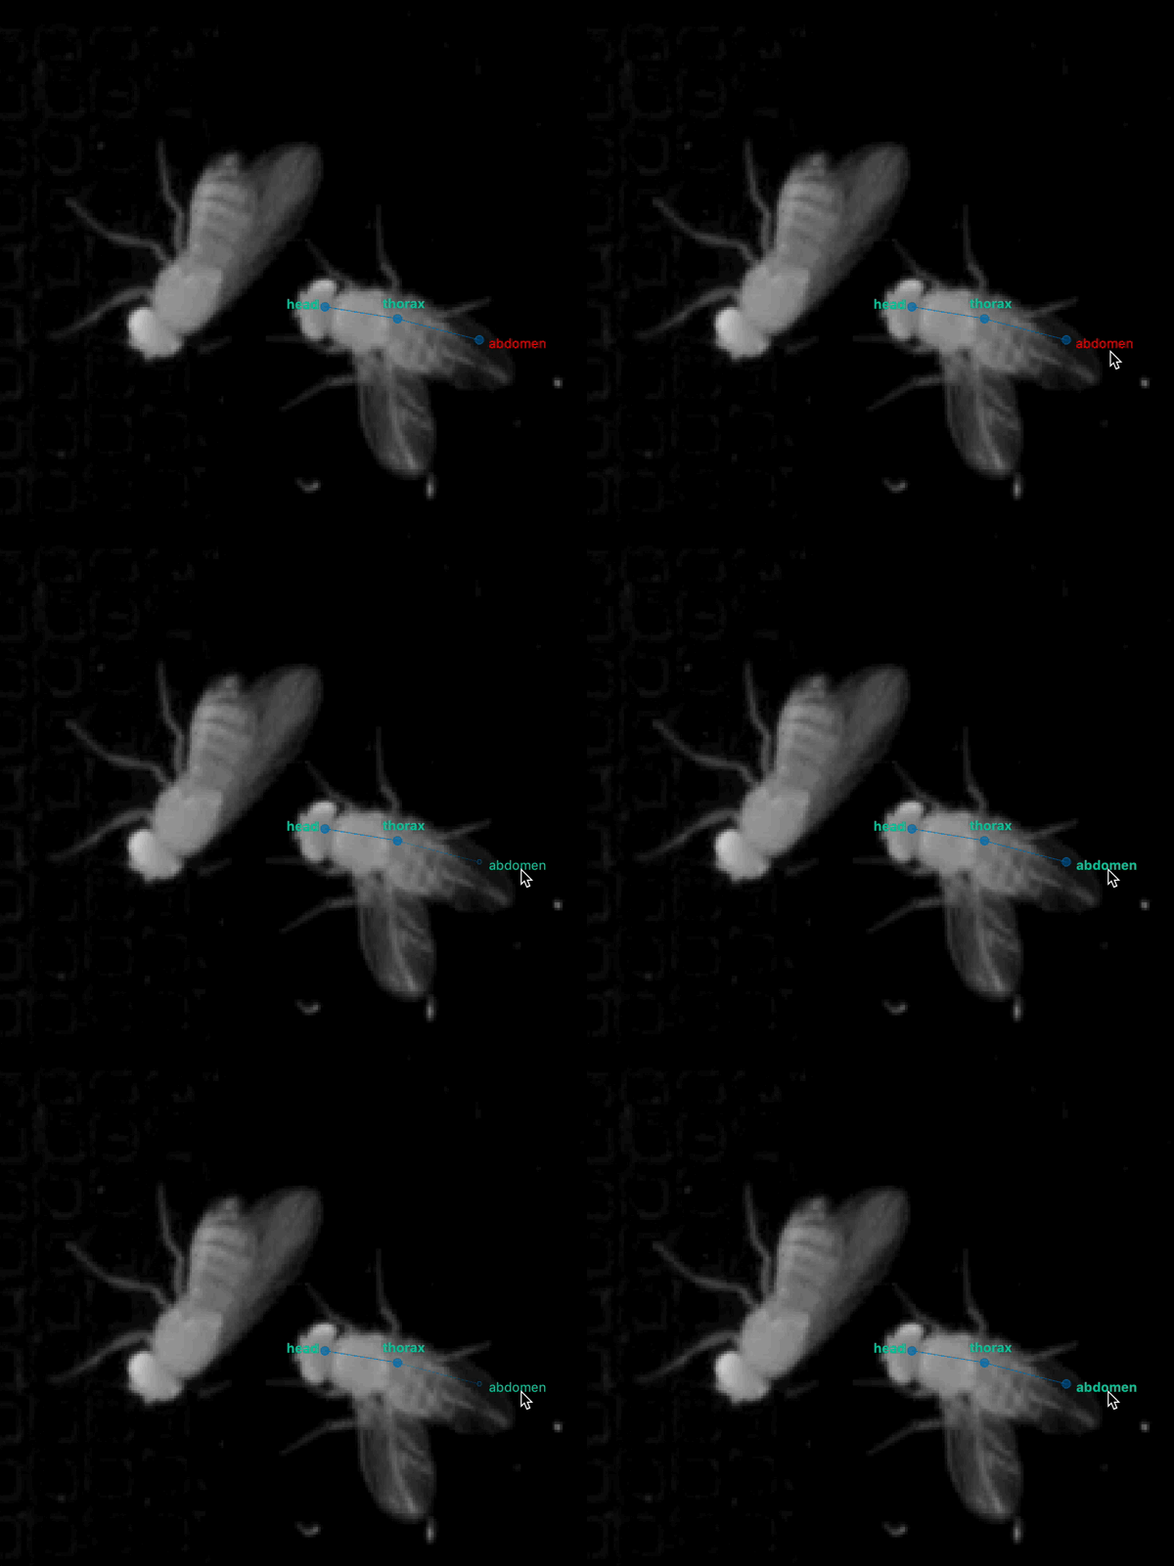
For body parts that are not visible in the frame, right-click the node (or its name) to toggle visibility. The node will appear smaller to show that it’s marked as “not visible”. If you can determine where an occluded node would be in the image, you may label it as “visible” in order to train the model to predict the node even when it’s occluded.

When you label a frame, it’s best if you can label all the instances of your animal in the frame. Otherwise, the models may learn to not identify things that look like the instances you didn’t label.
Saving#
Since this is a new project, you’ll need to select a location and name the first time you save. SLEAP will ask you to save before closing any project that has been changed to avoid losing any work. Note: There is not yet an “undo” feature built into SLEAP. If you want to make temporary changes to a project, use the “Save As…” command first to save a copy of your project.
Labeling more frames#
After labeling the first frame and saving the project, it’s time to label more frames. Since you generated a list of suggested frames, you can go to the next frame in the labeling set by clicking “Next” under the list of suggested frames. You can also always pick a frame to label by using the seekbar under the video. Suggested and labeled frames will be shown as empty and filled blue bars, respectively.
When you add instances on subsequent frames, node positions will be copied from the instances in the prior labeled frame to increase labeling speed. Also try adding an instance by right-clicking on the location of the animal in the video. You’ll see a pop-up menu with options for how we determine the initial node placement. Feel free to try the different options.
There’s no need to be consistent about which animal you label with which instance for the case of multiple animals. For instance, suppose you have a male and a female. It’s fine to label the male with the blue instance in some frames and the orange instance in others. Tracking (and track proofreading) is the final stage in the workflow and occurs after predicting body part locations.
Continue to Training and Inference.
