Creating a custom training profile#
Case: You’ve created a project with training data on one computer, and you want to use a different computer for training models with custom hyperparameters.
Hyperparameters include the model architecture, learning rate, and data augmentation settings. While model parameters are learned from your data during training, hyperparameters are not learned from your data—they have to be set before training since they control the training process.
This guide will explain how to create a custom training profile but doesn’t cover how to decide what the hyperpameters should be. For more information about the hyperparameters, see our guide to Configuring models.
Training profiles are JSON files. The JSON format is fairly easy to read (and edit) with a text-editor and you can use the default “baseline” profiles as a starting point for creating your own training profiles. For example, take a look at the baseline bottom-up profile or our other baseline profiles.
But if this sounds intimidating, you don’t have to edit the JSON file by hand! You can use the same GUI that’s used for training on a local machine to export custom training profiles.
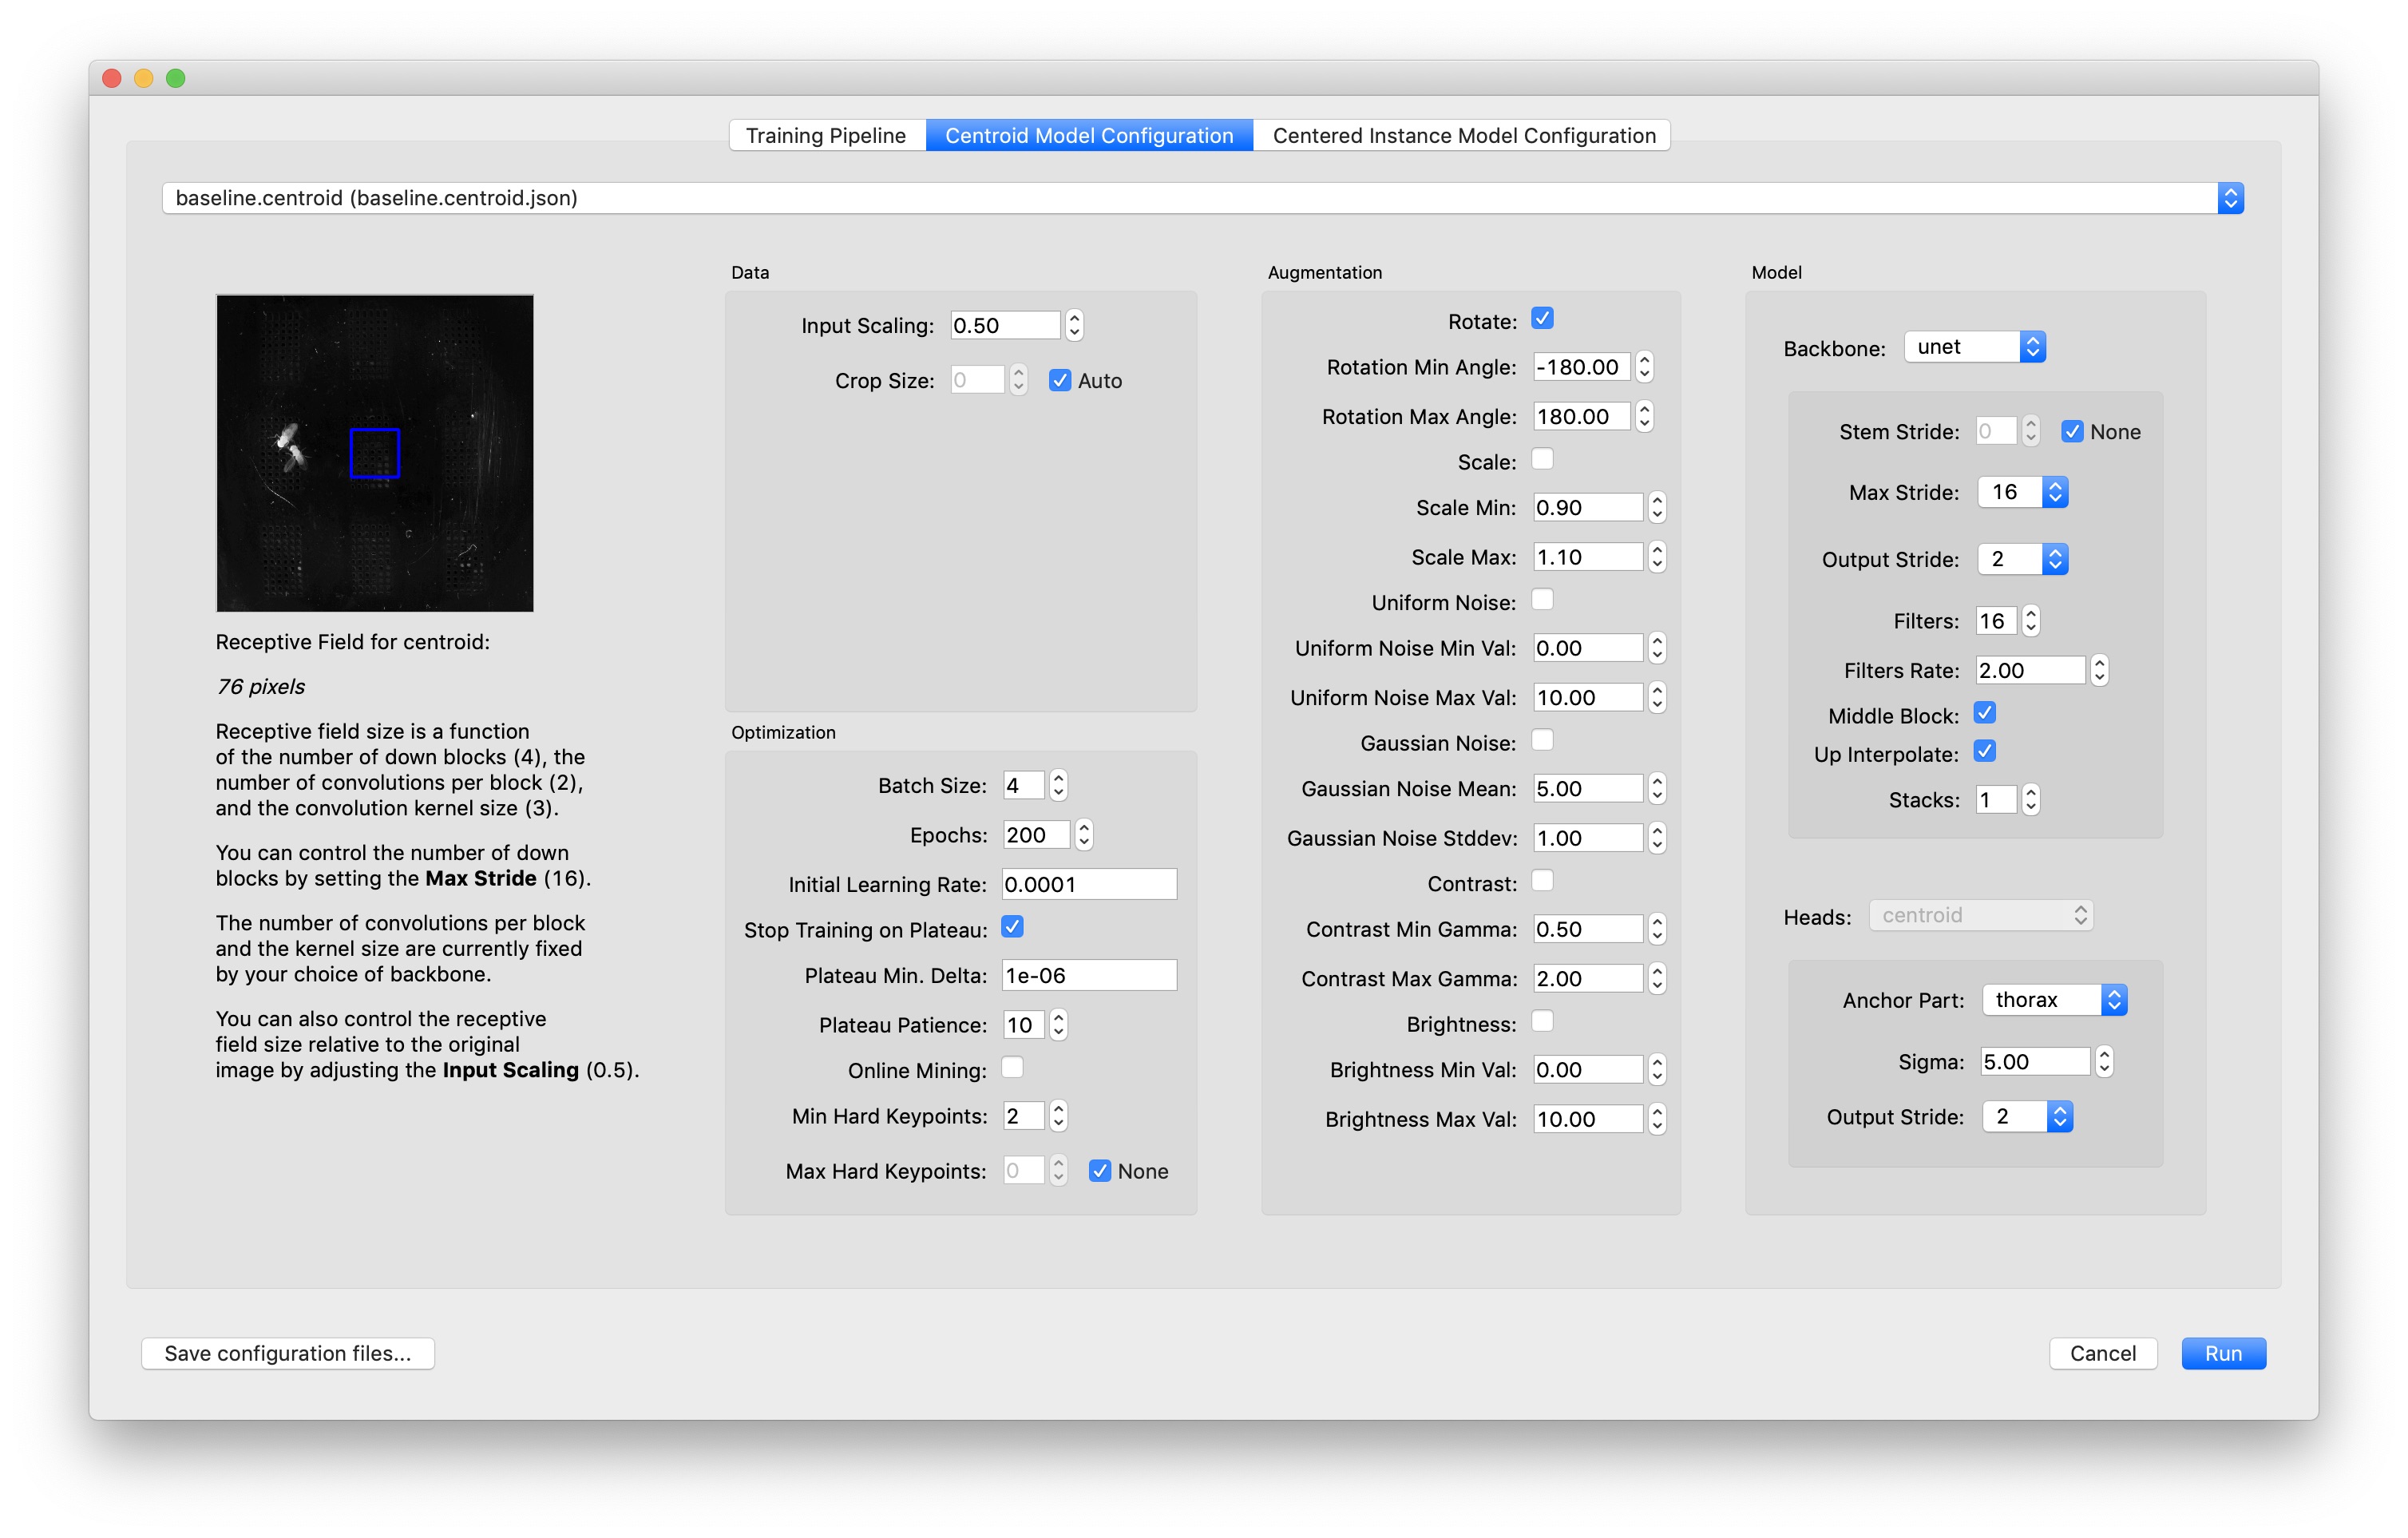
If it isn’t open already, run SLEAP and open the SLEAP project with your training dataset. Then select the “Run Training…” command in the “Predict” menu. You’ll see the training GUI which lets you configure the pipeline type and the hyperparameters for each model:

First pick the desired pipeline (i.e., top-down, bottom-up, or single animal). For each model in the pipeline, you’ll then see a “Model Configuration” tab—in the image above with the top-down pipeline, there’s one tab for configuring the centroid model and one for the centered instance model. Other pipelines will only have one model to configure.
You can click on each model configuration tab to configure the hyperpameters for training that model:
For advice about what you might want to customize with this dialog, see our guide to Configuring models.
Once you’ve configured each of your models, click the “Save configuration files…” button at the bottom of the dialog. You’ll be prompted for where to save the files. It’s a good idea to create a new folder which will contain the files since there will be multiple files exported.
Wherever you selected to save your files, you’ll now have a custom training profile(s) with the settings you selected in the dialog. The filename of the training profile(s) will be:
multi_instance.jsonfor a bottom-up pipeline,centroid.jsonandcentered_instance.jsonfor a top-down pipeline, andsingle_instance.jsonfor a single animal pipeline.
(There will also be a train-script.sh file with the command-line command you could use to train your dataset using these training profiles, and possibly an inference-script.sh file if you selected frames for inference after training.)
If you’re running training on a remote machine (including Colab), export your training job package into the remote machine. Then call:
sleap-train path/to/custom/profile.json path/to/dataset.pkg.slp
for each model you want to train (where path/to/custom/profile.json should be replaced with the path to your custom training profile and path/to/dataset.pkg.slp replaced with the path to your training job package). See our guide to [remote-train] for more details.
Note
If you exported the training package as a ZIP file, it contains both the .pkg.slp and .json files necessary to train with the configuration you selected in the GUI. Before running the sleap-train command, make sure to unzip this file.